

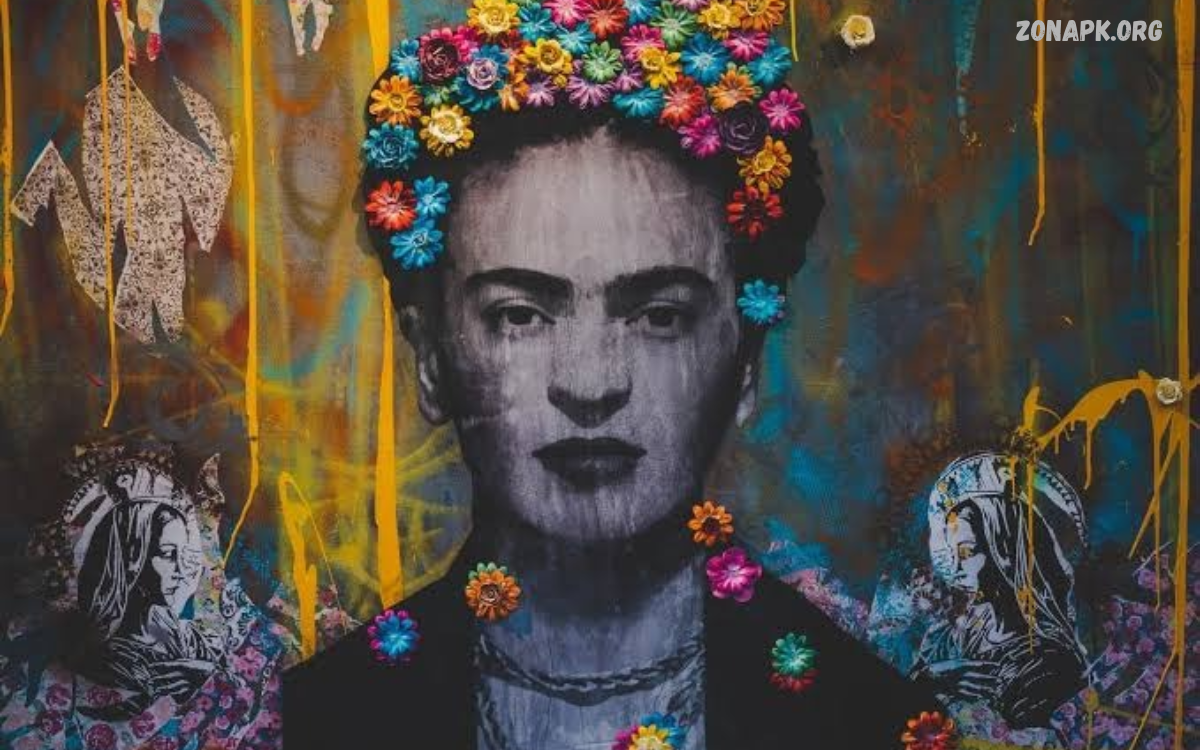
Artwork Photography transforms paintings, drawings, sculptures, handmade crafts, and creative designs into beautiful digital images. Proper techniques preserve original colors, textures, fine details, and artistic expression.
High-quality artwork photographs help viewers appreciate every detail without seeing the original piece in person. With proper lighting, accurate camera settings, careful composition, and thoughtful editing, beginners can achieve impressive results with a smartphone or digital camera.
What Is Artwork Photography?
Artwork Photography is the process of capturing visual artwork through photography while maintaining its original appearance, color accuracy, texture, and proportions.
Professional artwork photography requires more than pointing a camera at a creative piece. Photographers must manage reflections, shadows, perspective, exposure, and white balance to produce clear images that faithfully represent the original artwork.
Importance of Artwork Photography
Artwork photography helps artists present their creations to wider audiences through digital platforms, printed portfolios, promotional materials, and online galleries. Clear photographs allow potential buyers, art enthusiasts, and exhibition organizers to examine creative work before making decisions.
Accurate artwork images also preserve valuable visual records of completed projects. Artists can document their progress, compare different techniques, maintain professional archives, and share their creative development with clients, followers, and future collaborators.
Essential Equipment for Artwork Photography
Choosing suitable equipment improves image clarity and simplifies the photography process. Beginners can start with a smartphone, tripod, natural window light, and a neutral background, while professional photographers may use interchangeable-lens cameras, studio lights, reflectors, and color calibration tools.
The best equipment depends on the artwork’s size, surface, and intended use. Small drawings require different arrangements from large paintings or three-dimensional sculptures, so selecting practical equipment helps maintain consistent image quality without unnecessary expenses.
Cameras for Artwork Photography
A camera with good resolution, reliable autofocus, and accurate color reproduction can capture fine artistic details. DSLR and mirrorless cameras provide manual controls that help photographers adjust exposure, aperture, ISO, and white balance according to different artwork requirements.
Modern smartphones can also produce excellent artwork photographs when used carefully. Clean camera lenses, sufficient lighting, stable positioning, and suitable resolution settings often matter more than expensive equipment when creating images for websites and social media.
Tripods and Camera Stability
A tripod keeps the camera steady and helps maintain consistent framing throughout an artwork photography session. Stability becomes particularly important when photographing detailed illustrations, textured paintings, or artwork in lower light, where small movements can reduce sharpness.
Position the tripod securely on a level surface and align the camera with the center of the artwork. A remote shutter, timer, or camera app can reduce movement during exposure and improve the consistency of repeated photographs.
Lenses for Artwork Photography
A standard or short telephoto lens often works well for photographing flat artwork because it can produce natural proportions when positioned correctly. Prime lenses with low distortion are useful for paintings, drawings, and prints that require straight edges and accurate geometry.
Avoid extremely wide-angle lenses when photographing flat artwork from a short distance. Wide-angle distortion can make the edges appear stretched or cause rectangular paintings to look uneven, reducing the professional appearance of the final image.
Best Lighting Techniques for Artwork Photography
Lighting plays a major role in determining how artwork appears in a photograph. Balanced illumination reveals colors, textures, brushstrokes, and small details while preventing harsh shadows, bright reflections, and uneven exposure across the artwork’s surface.
Soft, consistent lighting usually works best for paintings, drawings, and printed illustrations. Photographers can use diffused daylight, softboxes, or studio lights positioned at suitable angles to illuminate the artwork evenly without creating distracting glare.
Using Natural Light
Natural window light provides an accessible and affordable option for artwork photography. Choose a bright location with indirect daylight, place the artwork near the window, and avoid direct sunlight that may create harsh highlights or uneven brightness.
Photographing during consistent daylight helps maintain natural-looking colors and balanced exposure. Turn off mixed indoor lighting when possible, because combining different light sources can introduce unwanted color casts that make white backgrounds appear yellow, blue, or green.
Using Artificial Lighting
Artificial lighting gives photographers greater control over brightness, direction, and consistency. Two matching lights placed at equal angles on opposite sides of flat artwork can reduce shadows and provide balanced illumination across the surface.
Use diffusers or softboxes to spread light gently and minimize harsh highlights. For accurate color reproduction, choose high-quality lights with consistent color temperature and a high color rendering index, especially when photographing artwork intended for professional portfolios or sales listings.
Avoiding Glare and Reflections
Glossy paintings, framed prints, glass-covered artwork, and polished surfaces can reflect nearby windows, lamps, or the photographer. These reflections may obscure important details and make the final image less useful for viewing or evaluating the artwork.
Move lights away from the direct reflection angle and adjust the camera position when necessary. A polarizing filter may reduce certain reflections, although it cannot eliminate every type of glare and may affect exposure or color depending on the setup.
Camera Settings for Artwork Photography
Correct camera settings help preserve fine details, natural colors, and balanced exposure. When using a camera with manual controls, select a low ISO, an appropriate aperture, and a shutter speed that produces a sharp image without introducing unwanted noise or motion blur.
For flat artwork, an aperture around f/5.6 to f/8 can provide good sharpness with many lenses, although the ideal setting depends on the camera, lens, distance, and artwork. Use the histogram and image preview to check exposure instead of relying entirely on the screen’s brightness.
Choosing the Right ISO
ISO determines how sensitive the camera’s image sensor is to light. A low setting, such as ISO 100 or 200, generally produces cleaner photographs with less visible noise when sufficient lighting is available.
For artwork photography, a low ISO is especially helpful when capturing fine pencil marks, subtle paint transitions, and delicate textures. If the lighting is limited, stabilize the camera and adjust the exposure before increasing ISO unnecessarily.
Selecting the Best Aperture
Aperture controls the amount of light entering the camera and influences depth of field. Flat artwork usually requires consistent sharpness across the entire surface, making moderate apertures a practical starting point for many photography setups.
Extremely wide apertures can create uneven sharpness when the artwork and camera are not perfectly aligned. Very narrow apertures can also reduce fine detail through diffraction, so test a few settings to identify the sharpest result for your equipment.
Adjusting Shutter Speed
Shutter speed controls how long the camera sensor receives light. When the camera is mounted on a tripod, slower shutter speeds can provide proper exposure without requiring a high ISO, provided the artwork and surrounding setup remain stationary.
Handheld photography requires a sufficiently fast shutter speed to prevent camera shake. Use a tripod whenever possible for artwork documentation, especially when working indoors or capturing detailed images under moderate lighting conditions.
Composition Techniques for Artwork Photography
Composition determines how the artwork appears within the photograph and how easily viewers can examine its details. A professional image should keep the artwork clearly visible, avoid distracting surroundings, and preserve the intended proportions of the original piece.
For flat artwork, position the camera directly in front of the center of the surface. Align the camera sensor parallel to the artwork to reduce perspective distortion, and leave a small, consistent margin around the edges when the image will be used in a portfolio or online listing.
Centering the Artwork
Centering the artwork creates a balanced presentation and makes the image easier to evaluate. This approach works particularly well for paintings, framed illustrations, certificates, prints, and other rectangular or square pieces that need accurate documentation.
Check the spacing around each edge before taking the photograph. Small adjustments to the camera position can correct uneven margins and prevent the artwork from appearing tilted or awkwardly placed within the frame.
Using Backgrounds Effectively
A simple background helps the artwork remain the main focus of the photograph. White, gray, black, and neutral-colored backgrounds can work well, depending on the artwork’s colors, shape, and intended presentation.
Choose a background that separates the artwork clearly without competing with its design. For sculptures and crafts, a seamless background can create a clean studio appearance, while a carefully selected environment may add context to certain decorative or handmade objects.
Capturing Different Angles
Different angles reveal different aspects of an artwork, especially when photographing sculptures, ceramics, installations, and textured objects. A front-facing image communicates the overall design, while side views and detail photographs help viewers understand depth, structure, and surface characteristics.
Flat artwork generally benefits from a straight-on photograph for accurate documentation. Three-dimensional pieces may require several carefully chosen viewpoints, including front, side, rear, and close-up images, depending on the features that make the object distinctive.
Artwork Photography for Paintings
Paintings often contain subtle color transitions, visible brushstrokes, and surface textures that require careful photographic treatment. Oil paintings, acrylic canvases, watercolors, and mixed-media works each respond differently to lighting, so photographers should examine the surface before selecting a setup.
Use balanced lighting to reveal the painting without creating distracting reflections or exaggerated contrast. Keep the camera parallel to the canvas, check the edges for alignment, and capture enough resolution to preserve fine details when the image is viewed on a larger screen.
Photographing Oil Paintings
Oil paintings frequently have textured surfaces and glossy areas that reflect light unevenly. Soft illumination from carefully positioned lights can reveal brushwork while reducing bright reflections across varnished sections of the painting.
Avoid placing a strong light directly in front of the canvas. Take test photographs from different light angles, compare the results, and select the setup that preserves the painting’s colors and texture without creating distracting highlights.
Photographing Watercolor Paintings
Watercolor artwork often contains delicate washes, transparent layers, and subtle variations in tone. Accurate white balance and even lighting help preserve these characteristics, especially when the original paper is bright white or contains very pale colors.
Avoid overexposure, which can remove detail from light areas and make paper texture difficult to see. Photograph the work against a neutral background, keep the camera aligned, and check that pale washes remain visible in the final image.
Artwork Photography for Drawings and Illustrations
Drawings and illustrations require clear focus because fine lines, shading, and small marks contribute significantly to the finished design. Pencil sketches, ink drawings, charcoal studies, and colored illustrations benefit from stable camera positioning and soft, even illumination.
Keep the paper flat whenever possible and avoid lighting that creates shadows along curled edges. Use a high-resolution capture setting, check the sharpness of small details, and ensure that the paper’s original tone remains consistent with the physical artwork.
Photographing Pencil Sketches
Pencil sketches contain subtle differences between light shading and dark outlines. A balanced exposure preserves these tonal variations and prevents the page from appearing excessively bright or the pencil marks from becoming difficult to distinguish.
Place the sketch on a flat surface and position the camera directly above it. Use diffused light to reduce shadows, and avoid excessive contrast adjustments during editing because they can remove delicate shading or make graphite marks appear unnatural.
Photographing Digital Illustrations
Digital illustrations may be displayed on computer monitors, tablets, or printed sheets. For artwork already stored digitally, exporting the original file usually provides better image quality than photographing a screen, which can introduce glare, reflections, and visible display patterns.
When a physical print must be photographed, use even lighting and accurate color settings. Preserve the original resolution when possible, select an appropriate file format, and compare the photograph with the digital source to identify unwanted color shifts.
Artwork Photography for Sculptures and Crafts
Sculptures, ceramics, handmade jewelry, and decorative crafts require a different approach from flat artwork. Their three-dimensional forms create natural shadows and highlights, making lighting direction and background selection important for communicating shape and material.
Use a stable surface and choose camera angles that reveal the object’s defining features. Photograph the entire piece first, then capture additional images of distinctive textures, construction details, patterns, and finishes that viewers may want to examine closely.
Photographing Small Crafts
Small crafts often benefit from close-up photography that reveals intricate details. Handmade jewelry, miniature sculptures, decorated objects, and small ceramic pieces can be photographed using a macro lens or a camera’s close-focus mode when the equipment supports it.
Use a plain background and position the object so that important details remain visible. A tripod, diffused lighting, and careful focusing help create sharp photographs that communicate the quality and craftsmanship of the finished piece.
Photographing Large Sculptures
Large sculptures may require more space, longer camera distances, and careful consideration of the surrounding environment. Choose a location with enough room to photograph the entire object without unwanted obstructions or distracting background elements.
Capture the sculpture from multiple viewpoints to communicate its proportions and structure. For outdoor pieces, consider the direction and quality of daylight, and ensure that shadows contribute to the image rather than hiding important features.
Smartphone Artwork Photography Tips
Smartphone photography offers a convenient way to document artwork without purchasing specialized equipment. Modern phones provide high-resolution cameras, exposure controls, editing tools, and grid overlays that can help beginners produce clean images for portfolios, social platforms, and online galleries.
Clean the camera lens, stabilize the phone, and use the main camera rather than unnecessary digital zoom. Position the phone parallel to flat artwork, tap to focus, and check the exposure before capturing the image to avoid losing important details.
Using Smartphone Camera Features
Grid lines help align the camera with the artwork and maintain balanced framing. Exposure adjustment allows users to brighten or darken the image, while focus controls help ensure that important details remain sharp.
Use the highest practical image quality available in the camera settings. Avoid filters during the initial capture because they may alter the original colors, and preserve an unedited copy so the photograph can be adjusted later without losing the original image.
Avoiding Common Smartphone Mistakes
Common problems include tilted framing, poor lighting, digital zoom, fingerprints on the lens, and excessive image processing. These mistakes can reduce clarity or distort the artwork’s colors, even when the phone has a capable camera.
Use a tripod or stable support whenever possible and photograph in a well-lit area. Review the image at full size after taking it, checking the corners, edges, and fine details before deciding that the photograph is ready to publish.
Editing Artwork Photography
Editing helps correct minor exposure problems, improve alignment, and prepare images for different publishing platforms. A careful workflow can enhance presentation while preserving the original artwork’s appearance, making the photograph more useful for professional documentation and online display.
Useful adjustments include cropping, straightening, white balance correction, and modest exposure changes. Keep editing restrained because excessive saturation, contrast, sharpening, or artificial filters can change the artwork’s character and create an inaccurate representation of the original piece.
Cropping and Straightening
Cropping removes unnecessary space around the artwork and helps create a consistent presentation. Straightening corrects small alignment errors, making rectangular paintings, framed pieces, and printed illustrations appear properly positioned within the image.
Leave enough space to show the complete artwork unless a close-up is intentionally required. Avoid cropping signatures, borders, or meaningful details, and retain a separate full-frame version for archival purposes.
Correcting Colors and White Balance
White balance affects how neutral colors appear in a photograph. If the lighting introduces a yellow, blue, or green cast, adjusting white balance can help the image more closely match the original artwork under appropriate viewing conditions.
Compare the edited photograph with the physical artwork under neutral lighting whenever possible. Avoid changing individual colors simply to make the image more striking, particularly when the photograph will represent an original painting or illustration for sale.
Choosing Editing Software
Photo-editing applications provide tools for correcting exposure, adjusting white balance, straightening images, and exporting files in suitable formats. Beginners can use accessible mobile editors, while advanced photographers may prefer desktop software with more detailed color-management controls.
Select software according to your workflow, device, and required output quality. Save a high-quality master image before creating smaller versions for websites, social media, email, or other platforms that may compress uploaded photographs.
Best File Formats for Artwork Photography
Choosing the correct file format helps preserve image quality and supports different publishing requirements. JPEG is widely used for websites and online portfolios because it offers practical file sizes, while PNG can be useful when lossless storage or transparency is required for particular graphic assets.
For professional documentation, consider retaining RAW files when the camera supports them, alongside edited high-quality exports. RAW files preserve extensive image information for later adjustments, while TIFF may be appropriate for workflows that require high-quality image storage and compatible editing software.
JPEG for Websites and Portfolios
JPEG works well for many artwork photography applications because it balances image quality with manageable file sizes. It is widely supported across browsers, content management systems, online galleries, and social media platforms.
Export JPEG images at a quality level that preserves visible details without creating unnecessarily large files. Examine fine lines, gradients, and textured areas after export to ensure that compression has not introduced distracting artifacts.
PNG and TIFF for High-Quality Images
PNG supports lossless compression and preserves sharp edges, making it useful for illustrations and certain graphic artwork. TIFF is commonly used in professional image workflows where high-quality storage and editing flexibility are important.
Neither format automatically guarantees accurate colors or better photography. Image quality still depends on the original capture, editing process, resolution, color profile, and the requirements of the intended display or printing system.
Read Also: 10 Easy Business Outfit Ideas for Everyday Office Wear
Artwork Photography for Online Stores
Online stores depend on clear product images that help customers understand an artwork’s appearance, size, texture, and condition. Consistent backgrounds, accurate colors, suitable resolution, and multiple viewpoints can make listings easier to evaluate and improve the overall shopping experience.
Photograph each piece under similar lighting conditions and maintain consistent framing across the collection. Include a complete view of the artwork, relevant detail images, and additional angles when necessary, while ensuring that the photographs accurately represent the item being offered.
Creating Professional Product Images
Professional product images should show the artwork clearly without unnecessary distractions. A neutral background, even illumination, and careful alignment allow viewers to focus on the design rather than the photographic setup.
For framed pieces, check the glass for reflections and ensure that the frame edges remain straight. For unframed paintings, include the full canvas and consider a separate detail image showing texture or distinctive brushwork when those features are important to buyers.
Showing Artwork Size and Detail
Customers often need a clear understanding of an artwork’s dimensions before purchasing it. Include accurate measurements in the product description and consider an additional contextual photograph that demonstrates the object’s scale without misleading viewers.
Close-up photographs can reveal signatures, surface textures, patterns, and other details. Ensure that close-ups correspond to the actual item and do not exaggerate features through excessive sharpening, contrast, or misleading camera angles.
Artwork Photography for Social Media
Social media platforms allow artists to share new creations, behind-the-scenes processes, exhibitions, and completed projects with a broad audience. Attractive, well-composed photographs help communicate the artwork’s visual qualities and maintain a recognizable presentation across posts.
Prepare images according to the intended platform’s aspect ratio and display requirements. Keep the artwork visible at smaller screen sizes, avoid unnecessary borders, and preserve an original high-resolution copy before resizing or compressing the image for publication.
Creating Engaging Artwork Posts
An engaging artwork post combines a clear photograph with a useful caption that explains the piece, its medium, or the creative process behind it. Artists can share inspiration, describe techniques, and invite viewers to explore additional work through their portfolios.
Choose photographs that represent the artwork accurately rather than relying entirely on decorative filters. Consistent lighting, clear composition, and thoughtful captions can help establish a professional visual identity and make an art portfolio easier to recognize.
Maintaining a Consistent Visual Style
A consistent photography style gives an artist’s online portfolio a more organized appearance. Similar backgrounds, balanced exposure, and repeatable framing help viewers compare different pieces without being distracted by major changes in photographic presentation.
Create a simple setup that can be repeated for future projects. Save useful camera settings, lighting arrangements, and editing preferences so that photographs remain visually consistent while still respecting the unique colors, dimensions, and textures of each artwork.
Common Artwork Photography Mistakes
Common mistakes include uneven lighting, inaccurate white balance, distorted perspective, excessive editing, and low-resolution exports. Each problem can make an artwork look different from the original or prevent viewers from examining important details clearly.
Review the complete image before publishing and compare it with the physical artwork whenever possible. Correct visible alignment errors, check the corners for unwanted shadows, and confirm that colors, textures, and fine lines remain clear at the intended display size.
Poor Lighting and Uneven Exposure
Poor lighting can create dark corners, harsh shadows, and distracting highlights that reduce the quality of artwork photographs. These problems often occur when a single strong light source illuminates one side of the artwork more brightly than the other.
Use diffused lighting and adjust the position of the light sources to achieve more balanced illumination. Take test photographs, inspect the image across the entire surface, and make corrections before capturing the final version.
Incorrect Camera Alignment
Incorrect alignment can cause rectangular artwork to appear trapezoidal or make one edge look larger than another. This perspective distortion is especially noticeable when photographing paintings, prints, and framed illustrations for professional documentation.
Position the camera centrally and keep its sensor parallel to the artwork. Use grid lines, a level, or alignment guides to check the framing, and correct any remaining perspective issues carefully during editing.
Overediting the Original Artwork
Excessive editing can change colors, remove subtle textures, and exaggerate contrast beyond what appears in the original piece. Although dramatic adjustments may produce an attractive image, they can reduce the photograph’s accuracy as a visual record.
Keep the original capture and make adjustments on a separate copy. Prioritize faithful color reproduction, natural contrast, and clear detail, particularly when creating images for art sales, exhibitions, archives, or professional portfolios.
Advanced Tips for Professional Artwork Photography
Professional artwork photography often relies on repeatable lighting, controlled color management, careful documentation, and consistent quality checks. These methods help photographers produce reliable images across different sessions, especially when working with valuable collections, galleries, museums, or commercial art projects.
Use a standardized setup for similar artworks and record important camera and lighting settings. A consistent workflow makes it easier to compare photographs, identify technical problems, and produce images that meet the requirements of clients, archives, printers, and online platforms.
Using Color Calibration
Color calibration helps reduce differences between the original artwork, the camera capture, the editing display, and the final output. A color reference chart photographed under the same lighting conditions can support more reliable color correction in compatible workflows.
For demanding reproduction work, use a calibrated monitor and suitable color-management settings. Remember that screens, printers, paper types, and ambient lighting can affect perceived colors, so the goal is a controlled and repeatable result rather than a guarantee that every display will look identical.
Creating Artwork Photography Archives
A well-organized archive protects artwork photographs and makes them easier to retrieve for future use. Store original captures, edited master files, web-ready exports, and relevant descriptions in clearly labeled folders with consistent naming conventions.
Record useful details such as the artwork title, creator, medium, dimensions, date photographed, and usage permissions when available. Maintain a backup on a separate storage device or trusted cloud service to reduce the risk of losing valuable documentation.
Photographing Artwork for Print
Images intended for printing require attention to resolution, color profiles, and the dimensions of the final printed product. A photograph that looks sharp on a phone screen may not provide enough detail for a large print, so check the intended output size before exporting.
Use high-quality source files and follow the printer’s specifications for resolution and color management. Avoid repeatedly saving JPEG files at low quality, and inspect a test print when accurate colors and fine details are essential to the final presentation.
How to Build an Artwork Photography Portfolio
An artwork photography portfolio demonstrates technical ability, consistency, and an understanding of different artistic materials. Include a carefully selected range of paintings, illustrations, sculptures, crafts, and detail photographs to show how your approach adapts to different subjects.
Choose images that demonstrate sharp focus, accurate color, balanced lighting, and thoughtful composition. Organize the portfolio into clear categories, provide concise captions where useful, and remove duplicate images that do not contribute meaningful variety to the overall collection.
Selecting Your Best Photographs
Select photographs that accurately represent the artwork and demonstrate your strongest technical results. Look for clean alignment, balanced exposure, consistent color, and clear details rather than choosing images solely because they contain dramatic lighting or strong visual effects.
Ask another person to review the portfolio for distracting errors or inconsistent presentation. Compare similar images side by side, keep the strongest version of each artwork, and ensure that the collection communicates a clear standard of quality.
Presenting Your Portfolio Online
An online portfolio should be easy to navigate and display images clearly across desktop computers, tablets, and smartphones. Use descriptive titles, sensible image dimensions, and optimized files so visitors can explore the work without unnecessary loading delays.
Include contact information or a suitable inquiry method if you want potential clients to discuss photography services. Provide accurate descriptions of your work, obtain permission before publishing artwork belonging to others, and explain your role in each project when clarification is needed.
Copyright and Ethical Considerations in Artwork Photography
Artwork photography can involve copyright, ownership, licensing, and privacy considerations. Photographing a physical artwork does not automatically grant permission to reproduce, distribute, sell, or use the underlying creative work for commercial purposes, so photographers should understand the relevant rights before publishing images.
Obtain permission when required, respect licensing conditions, and credit artists according to the agreed terms or applicable requirements. Museums, galleries, exhibitions, and private collections may also have specific photography rules, so check their policies before capturing or sharing images.
Frequently Asked Questions
What Is the Best Camera for Artwork Photography?
A DSLR or mirrorless camera with good resolution, manual exposure controls, and a suitable lens can produce excellent artwork photographs. However, a modern smartphone can also work well for smaller projects when lighting, focus, alignment, and image quality are handled carefully.
How Do You Photograph Artwork Without Glare?
Use diffused lighting, position the lights at suitable angles, and avoid placing reflective surfaces directly opposite bright light sources. For artwork behind glass, adjust the camera and lighting positions until unwanted reflections are minimized.
What Lighting Is Best for Artwork Photography?
Soft, even lighting is usually a good starting point for photographing flat artwork. Indirect daylight, diffused studio lights, and matching light sources on opposite sides can reveal detail without harsh shadows.
Can I Use My Phone for Artwork Photography?
Yes, a smartphone can produce high-quality artwork photographs for websites, social media, and personal portfolios. Clean the lens, use sufficient light, keep the phone steady, and align it carefully with the artwork.
How Do I Make Artwork Colors Look Accurate?
Use consistent lighting, select an appropriate white balance, and avoid overexposure that removes details from bright areas. Compare the photograph with the original artwork under neutral lighting and adjust colors carefully during editing.
Which File Format Is Best for Artwork Photography?
JPEG suits most websites and online portfolios because it balances good visual quality with manageable file sizes. PNG works well for illustrations and lossless graphics, while TIFF and RAW files suit professional editing and archival workflows.
How Can I Improve My Artwork Photography Skills?
Practice photographing different types of artwork while changing one variable at a time, such as lighting angle, exposure, camera distance, or background. Compare the results to understand which adjustments improve sharpness, color accuracy, and overall presentation.
Conclusion
Artwork Photography combines technical skill and creative judgment to preserve the appearance of paintings, drawings, sculptures, illustrations, and handmade objects.
Whether you use a smartphone or a professional camera, consistency and attention to detail remain essential.

1 Comment
Pingback: Digital Artwork Photography: A Complete Guide to Creative Digital Images - Zonapk