

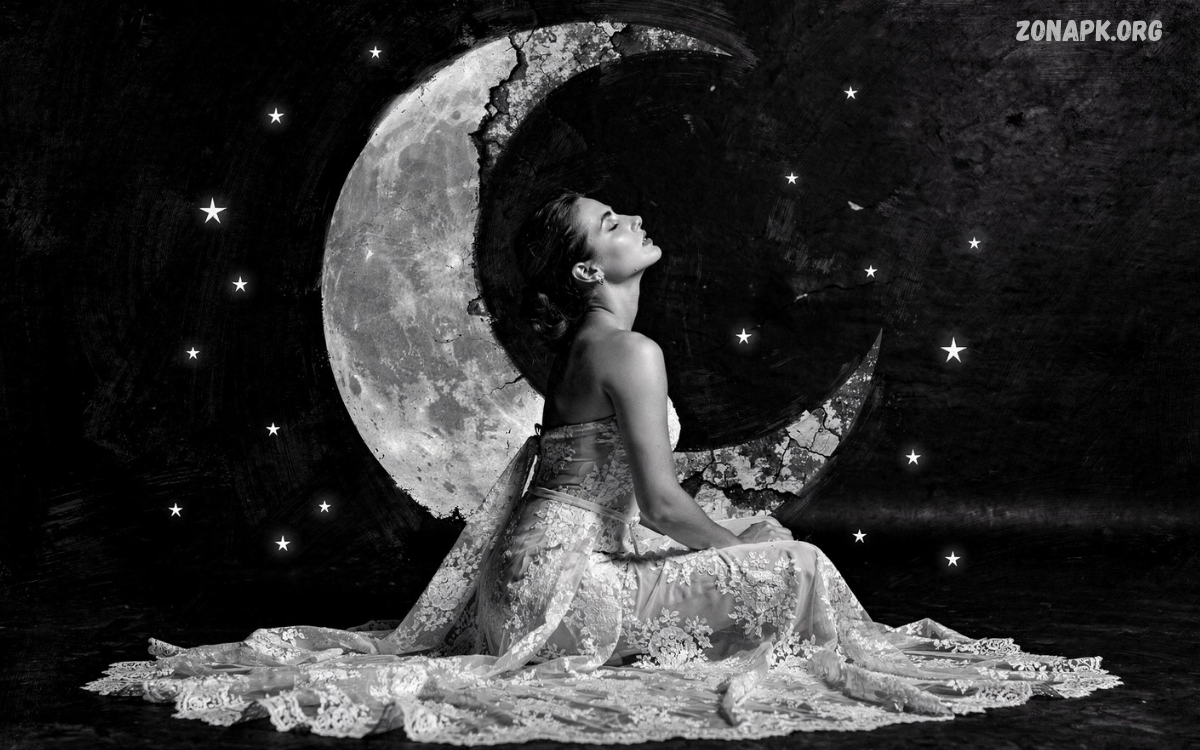
Artistic photography techniques transform ordinary scenes into expressive visual stories. With creative lighting, composition, color, perspective, and focus, photographers can convey emotions and ideas in every image.
Whether you use a smartphone or a professional camera, learning artistic photography techniques can help you develop a distinctive style. Simple experiments with shadows, reflections, movement, and natural light can produce memorable photographs.
What Are Artistic Photography Techniques?
Artistic photography techniques are creative methods for capturing images with visual impact, emotional depth, and personal meaning. These methods combine technical skills with imagination to turn everyday subjects into compelling photographs.
Photographers use composition, lighting, color, texture, and perspective to guide the viewer’s attention. Each technique offers different ways to express a mood, emphasize a subject, or create a unique visual experience.
Importance of Artistic Photography Techniques
Artistic photography helps photographers communicate ideas beyond the literal appearance of a subject. A simple flower, empty street, or ordinary window can become visually interesting when photographed with thoughtful framing and intentional lighting.
Learning artistic photography techniques also improves observation and creativity. Photographers begin noticing patterns, shapes, contrasts, and reflections that might otherwise go unnoticed, allowing them to create stronger images in familiar surroundings.
Creative Composition Techniques
Composition determines how visual elements appear within a photograph. Strong composition creates balance, establishes relationships between subjects, and directs attention toward the most important details without making an image feel crowded.
Different composition methods produce different effects. Symmetry creates order, negative space introduces simplicity, and diagonal lines add movement, giving photographers practical ways to make their images more expressive and visually engaging.
Rule of Thirds


10
The rule of thirds divides a frame into nine equal sections using two horizontal and two vertical lines. Placing the main subject near an intersection often creates a balanced image with a natural visual flow.
This technique works well for portraits, landscapes, architecture, and street photography. Try positioning a person’s eyes near an upper intersection or placing the horizon along a horizontal guide to create a more deliberate composition.
Leading Lines


9
Leading lines guide the viewer’s eyes through a photograph toward the main subject. Roads, bridges, fences, staircases, rivers, and building edges can all create visual pathways that strengthen the composition.
Experiment with different camera positions to discover how lines interact with the frame. Converging lines can create depth, while curved lines introduce a softer visual journey through the scene.
Symmetry and Patterns
Symmetry creates visual balance by repeating shapes or arranging elements around a central axis. Reflections in water, matching windows, architectural entrances, and carefully arranged objects provide excellent opportunities for symmetrical compositions.
Patterns create rhythm through repeated colors, textures, and forms. Breaking a pattern with one contrasting element can make the subject stand out, adding interest while maintaining a strong overall design.
Negative Space
Negative space refers to the relatively empty areas surrounding the main subject. Open skies, plain walls, calm water, and uncluttered backgrounds can help isolate a subject and give the photograph a clean, minimalist appearance.
Use negative space when you want to communicate calmness, loneliness, simplicity, or elegance. Leave sufficient room around the subject, while ensuring that the empty areas contribute to the image rather than distract from its purpose.
Understanding Light in Artistic Photography
Lighting influences the atmosphere, texture, contrast, and emotional impact of a photograph. Soft light creates gentle transitions between highlights and shadows, while hard light produces dramatic contrasts that can emphasize shapes and surface details.
Learning to recognize different lighting conditions helps photographers make better creative decisions. Observe how sunlight, cloudy skies, window light, and artificial sources affect your subject before selecting a camera angle or exposure setting.
Golden Hour Photography


8
Golden hour occurs shortly after sunrise and before sunset, when sunlight often appears warm and creates long, soft shadows. This lighting is especially useful for portraits, landscapes, flowers, and outdoor storytelling.
Position your subject so sunlight falls across the face, shines from behind, or illuminates the surroundings. Adjust exposure carefully to preserve bright details and create a warm, natural appearance without losing important textures.
Backlighting Techniques

Backlighting occurs when the primary light source sits behind the subject. This arrangement can create glowing edges, silhouettes, translucent textures, and a sense of depth that makes photographs appear more atmospheric.
To create a silhouette, expose for the brighter background and allow the subject to become dark. For a more detailed portrait, adjust exposure or use a reflector to bring light back onto the subject’s face.
Shadow Photography
Shadows introduce contrast, mystery, and geometric patterns into artistic photographs. Window frames, tree branches, staircases, and architectural structures can cast interesting shapes across walls, floors, faces, and other surfaces.
Experiment with photographing shadows during different times of day. Low-angle sunlight creates longer shapes, while direct midday sunlight often produces sharper edges and stronger contrast for graphic, minimalist compositions.
Color Theory in Artistic Photography
Color influences how viewers interpret a photograph and respond to its atmosphere. Warm colors such as orange, red, and yellow can communicate energy, while cooler blues and greens may suggest calmness, distance, or a peaceful environment.
Understanding color relationships helps photographers create images that feel intentional rather than visually random. Consider the dominant colors in a scene, identify possible contrasts, and remove distracting color elements whenever they compete with the main subject.
Complementary Colors
Complementary colors sit opposite each other on the traditional color wheel. Blue and orange, red and green, and purple and yellow can create striking visual contrast when used thoughtfully within a photograph.
Look for complementary combinations in clothing, flowers, city streets, architecture, and natural landscapes. A blue background behind an orange subject, for example, can establish clear separation and direct attention toward the focal point.
Monochrome Photography


10
Monochrome photography emphasizes tones, shapes, textures, and contrast instead of relying on multiple colors. Black-and-white images can feel timeless, dramatic, documentary, or minimalist, depending on the subject and lighting.
When creating monochrome photographs, study the relationship between bright highlights, middle tones, and deep shadows. Choose subjects with interesting textures or strong shapes, and check whether the composition remains effective without color.
Color Grading for Artistic Style
Color grading adjusts the visual character of an image through changes to hues, saturation, contrast, and tonal balance. A consistent grading approach can help a photographer develop a recognizable style across portraits, travel images, or creative projects.
Editing applications provide tools for adjusting individual colors and controlling highlights and shadows. Make small changes, preserve realistic skin tones when appropriate, and avoid excessive saturation that can remove detail or make photographs appear unnatural.
Perspective and Camera Angles
Perspective changes how subjects relate to their surroundings and how viewers interpret their size, shape, and position. Moving closer, stepping back, or changing camera height can produce noticeably different results even when photographing the same subject.
Explore multiple angles before deciding which image works best. Eye-level framing often feels familiar, low angles can emphasize height, and overhead viewpoints reveal patterns that remain hidden from ordinary viewing positions.
Low-Angle Photography
A low-angle photograph captures a subject from below, making buildings, trees, sculptures, and people appear more prominent. This perspective can communicate strength, scale, drama, or a sense of grandeur.
Place the camera near the ground and experiment with the amount of sky or background included in the frame. Watch for distracting foreground objects, and adjust the angle to keep important details clearly visible.
High-Angle Photography
High-angle photography involves positioning the camera above the subject and pointing it downward. This viewpoint works particularly well for flat lays, food photography, tabletop arrangements, street scenes, and patterns formed by crowds or architecture.
Try different heights rather than assuming that a directly overhead angle always works best. A slight downward angle may preserve depth, while a vertical overhead composition can emphasize shape, spacing, and geometric relationships.
Reflection Photography


12
Reflections create visual symmetry and can introduce a second perspective within the same frame. Lakes, puddles, mirrors, polished floors, glass buildings, and shop windows provide opportunities to create layered and imaginative compositions.
Look for calm surfaces, interesting light, and recognizable shapes that appear in both the original scene and its reflection. Change your position to control glare, and experiment with compositions that emphasize either the reflected image or the surrounding environment.
Long Exposure Photography
Long exposure photography records movement over a longer period, allowing moving subjects to appear blurred while stationary elements remain comparatively sharp. This technique can transform waterfalls, traffic, clouds, and nighttime environments into expressive visual scenes.
Use a tripod when you want buildings, landscapes, or other stationary objects to remain sharp. Choose a suitable shutter speed, manage exposure carefully, and use a timer or remote shutter release to reduce camera movement.
Light Trails at Night

Light trails form when moving vehicles or other light sources travel through the frame during a long exposure. Busy roads, bridges, and city intersections can create colorful lines that suggest movement and urban energy.
Mount the camera securely and experiment with shutter speeds suited to the speed of passing traffic. Keep the composition simple, protect bright highlights from overexposure, and focus on the relationship between the light trails and surrounding architecture.
Waterfall and Water Motion
Long exposures can make flowing water appear smooth and silky, creating a peaceful effect in landscape photographs. The contrast between soft water and sharp rocks, trees, or buildings gives the image a distinctive combination of movement and stability.
Use a tripod and adjust shutter speed according to the desired effect and available light. A neutral-density filter can reduce incoming light during bright conditions, making longer exposures possible without excessively brightening the image.
Motion Blur and Creative Movement
Motion blur communicates movement by allowing a moving subject or camera to shift during exposure. Instead of treating every blurred image as a mistake, photographers can use controlled movement to create energy, abstraction, and visual storytelling.
Experiment with moving subjects such as cyclists, dancers, runners, and passing vehicles. Adjust shutter speed according to the movement, take several photographs, and compare the results to find a balance between recognizable subjects and expressive blur.
Panning Photography

Panning involves following a moving subject with the camera while using a relatively slow shutter speed. The subject can remain comparatively sharp while the background becomes streaked, creating a strong impression of speed.
Stand securely, track the subject smoothly, and continue moving the camera briefly after pressing the shutter. Practice with predictable movement and take multiple attempts because timing, distance, and movement consistency affect the final result.
Intentional Camera Movement
Intentional camera movement, often called ICM, creates abstract photographs by moving the camera during exposure. Vertical movements can transform trees into flowing patterns, while horizontal movements can simplify landscapes into broad bands of color.
Choose a scene with strong colors or recognizable shapes, then experiment with movement direction and shutter speed. Results vary considerably, so capture several versions and evaluate which images communicate the desired mood most effectively.
Macro Photography and Fine Details
Macro photography reveals small details that are often difficult to notice with the naked eye. Insects, flower petals, water droplets, fabric, and everyday objects can become fascinating subjects when photographed at close range.
Work with steady camera positioning, sufficient light, and careful focusing. Depth of field becomes limited at close distances, so decide which details should remain sharp and adjust the aperture, focus position, or camera angle accordingly.
Texture and Pattern Photography


9
Texture photography emphasizes surface qualities such as rough stone, delicate fabric, weathered wood, and patterned leaves. Side lighting often reveals these details by creating tiny highlights and shadows across the surface.
Fill the frame with repeating shapes or contrasting textures to create images that feel graphic and abstract. Move closer, change the light direction, and explore how small focus changes can alter the subject’s appearance.
Focus and Depth of Field
Depth of field describes the range of distances that appear acceptably sharp in a photograph. A shallow depth of field separates the subject from the background, while a deeper depth of field can preserve detail across an entire landscape or scene.
A wider aperture generally produces a shallower depth of field under comparable conditions. Subject distance, focal length, and sensor size also affect the result, so test different settings rather than relying on aperture alone.
Read Also: Modern Photography Artwork: A Complete Guide
Portrait Photography Techniques
Artistic portrait photography combines expression, lighting, background, and composition to communicate something about a person. The goal is to create an intentional image while preserving the subject’s natural character and individual features.
Begin by choosing a suitable location and helping the subject feel comfortable. Give simple posing suggestions, observe natural expressions, and adjust lighting or framing to support the atmosphere you want the photograph to communicate.
Environmental Portraits
Environmental portraits show people within places connected to their activities, interests, or surroundings. A musician in a practice room, an artist beside a workspace, or a gardener among plants can tell a richer story than an isolated headshot.
Include enough background information to establish context without allowing it to overpower the subject. Use framing, depth of field, and light to balance the person with the environment, creating a photograph that communicates both identity and place.
Silhouette Portraits
Silhouette portraits use a bright background and a darker subject to emphasize outlines and body language. This approach works particularly well near windows, during sunset, or in locations where a strong light source can sit behind the subject.
Position the subject so the outline remains recognizable, paying attention to the separation between arms, face, and body. Simple poses often produce clearer silhouettes, while carefully arranged negative space helps preserve the shape of the subject.
Smartphone Artistic Photography Techniques
Smartphone cameras provide practical tools for creative photography without requiring expensive equipment. Modern devices often include portrait modes, exposure controls, multiple focal lengths, night modes, and editing features that support a wide range of artistic approaches.
Clean the camera lens, tap the main subject to focus, and adjust exposure when highlights or shadows look incorrect. Explore your phone’s native camera settings, but avoid digital zoom when possible because cropping a full-resolution image can preserve more detail.
Using Gridlines and Exposure Control
Gridlines help align horizons, organize subjects, and apply composition methods such as the rule of thirds. They also make it easier to identify tilted buildings or uneven framing before capturing an image.
Many smartphone cameras allow you to adjust exposure by tapping the screen and moving an exposure control. Slightly reducing exposure can preserve bright skies or glowing lights, while careful adjustments can improve detail in darker scenes.
Creative Smartphone Editing
Smartphone editing applications provide controls for cropping, color correction, contrast, sharpness, and selective adjustments. These tools make it possible to refine an image directly on the device without needing a desktop computer.
Start with exposure and white balance before making stylistic changes. Apply filters carefully, retain important detail, and compare the edited photograph with the original to ensure that your adjustments improve the image rather than distract from its subject.
Artistic Photography Techniques for Landscapes
Landscape photography combines natural light, composition, weather, and perspective to capture the character of a location. Strong images often depend on thoughtful timing and an awareness of foreground, middle ground, and background elements.
Explore locations under different conditions instead of relying on one visit. Fog, clouds, changing seasons, reflections, and shifting sunlight can transform the same landscape, offering fresh opportunities for expressive images.
Foreground, Middle Ground, and Background
Including distinct layers creates a stronger sense of depth in landscape photographs. A foreground rock, a middle-ground river, and distant mountains can guide the viewer through the image while communicating the scale of the environment.
Choose foreground elements that support the main subject rather than compete with it. Adjust your camera position until the layers work together, and select an aperture that keeps the important parts of the scene sufficiently sharp.
Minimalist Landscape Photography
Minimalist landscapes use a limited number of visual elements to create a simple, balanced composition. Empty skies, isolated trees, quiet coastlines, and distant mountains can become compelling subjects when unnecessary details are excluded.
Look for clean backgrounds, subtle color relationships, and deliberate spacing. A small subject surrounded by open space can create a strong sense of scale, while restrained compositions encourage viewers to focus on shape, atmosphere, and light.
Abstract Photography Techniques
Abstract photography emphasizes shape, color, texture, lines, and patterns rather than showing a subject in a conventional way. Familiar objects can become visually unfamiliar through close framing, unusual angles, reflections, and selective focus.
Look for interesting details in ordinary surroundings, including painted walls, metallic surfaces, glass, fabric, and architectural structures. Move closer or change perspective until the subject becomes a collection of visual elements instead of a straightforward representation.
Multiple Exposure Photography
Multiple exposure photography combines two or more images into a single composition. The resulting photograph can blend portraits with natural textures, architecture with trees, or different views of the same subject to create a layered visual narrative.
Some cameras offer a built-in multiple exposure feature, while editing software can combine separate photographs. Select images with compatible shapes and tonal values, and adjust their placement carefully to maintain visual clarity.
Refraction Photography
Refraction occurs when light changes direction as it passes through materials such as glass or water. Glass objects, transparent surfaces, and water-filled containers can distort backgrounds and create unusual shapes, reversed details, or miniature-looking scenes.
Place an interesting subject behind a transparent object and observe how the image changes with distance and angle. Use controlled lighting, experiment with focus, and keep the composition simple enough for the unusual optical effect to remain noticeable.
Night Photography and Low-Light Creativity
Night photography offers opportunities to explore illuminated buildings, streetlights, signs, stars, and reflections. Low-light conditions require careful exposure choices because limited illumination can increase noise, reduce sharpness, and make focusing more difficult.
Use a stable camera position when working with longer shutter speeds, and avoid moving the camera during exposure. Consider the relationship between artificial lights and surrounding darkness, using highlights to establish a focal point within the composition.
Night Portraits
Night portraits combine available light sources with expressive backgrounds to create a distinctive atmosphere. Shop windows, illuminated streets, decorative lights, and softly lit interiors can provide attractive lighting without complicated equipment.
Move your subject toward a suitable light source and check how it falls across the face. Use a faster shutter speed when movement is likely, and adjust the camera’s exposure or sensitivity to balance subject detail against the surrounding darkness.
Star Photography
Star photography captures the night sky, emphasizing celestial patterns and the vastness of the landscape. Clear skies, limited light pollution, and a stable tripod can improve results, especially when photographing stars above mountains, fields, or distant silhouettes.
Use manual focus when autofocus struggles with darkness, and check focus by reviewing the image at high magnification. Exposure time, aperture, and ISO should be balanced according to your equipment and the desired result.
Essential Camera Settings for Artistic Photography
Understanding shutter speed, aperture, and ISO gives photographers greater control over the final image. These settings influence motion, depth of field, brightness, and image quality, making them essential tools for turning a creative idea into a photograph.
Shutter speed controls how long the sensor receives light, aperture affects the lens opening, and ISO determines the sensor’s amplification or sensitivity setting. Adjusting one setting may require changes to the others to maintain suitable exposure.
Shutter Speed
Fast shutter speeds help freeze movement, making them useful for sports, wildlife, and active street scenes. Slower shutter speeds record movement over time, supporting creative effects such as flowing water, light trails, and intentional motion blur.
Choose the shutter speed according to the subject’s movement and the effect you want. If the scene becomes too bright during a long exposure, reduce incoming light or use a neutral-density filter when appropriate.
Aperture and ISO
Aperture affects depth of field and the amount of light entering the lens. Wider apertures are useful for isolating subjects, while narrower apertures can help keep more of a landscape in focus when conditions allow.
ISO adjustments help manage exposure when light levels change, but higher settings can introduce additional image noise. Use the lowest practical ISO for the scene, increasing it when a faster shutter speed is necessary to capture movement or avoid camera shake.
Photo Editing Techniques for Artistic Results
Editing helps photographers refine exposure, correct color, improve composition, and establish a consistent visual style. Effective editing supports the original creative intention instead of relying on heavy effects to compensate for a weak photograph.
Begin with basic adjustments, including exposure, white balance, highlights, shadows, and cropping. Review the image at different sizes, preserve important details, and make sure the final result remains suitable for its intended use.
Cropping and Straightening
Cropping removes distracting elements and strengthens the relationship between the subject and surrounding space. Changing the aspect ratio can also adapt an image for a website, social media post, print, or photographic portfolio.
Straightening corrects tilted horizons and architectural lines when a balanced appearance is desired. Experiment with alternative crops, but retain enough resolution for the final display size and avoid removing details that contribute to the image’s story.
Selective Adjustments
Selective editing allows photographers to adjust specific areas instead of changing the entire image. Brightening a face, reducing a distracting highlight, or gently increasing contrast around a focal point can improve visual hierarchy.
Use brushes, masks, or subject selection tools where available. Keep transitions natural and compare the edited result with the original, ensuring that local adjustments do not create obvious halos, uneven colors, or unrealistic textures.
Common Mistakes in Artistic Photography
One common mistake is adding too many visual elements without establishing a clear subject. Busy backgrounds, distracting highlights, excessive saturation, and poorly placed objects can weaken an image even when the subject itself is interesting.
Another mistake is relying on equipment instead of observation and experimentation. Expensive cameras cannot replace good timing, thoughtful composition, or an understanding of light, so focus on improving creative decisions before purchasing additional gear.
How to Practice Artistic Photography Techniques
Regular practice helps photographers recognize creative opportunities and understand how different settings affect the final result. Choose one technique at a time, such as leading lines, backlighting, reflections, or motion blur, and explore several ways to apply it.
Review your photographs after each session and identify what works well and what could improve. Compare framing, exposure, focus, and lighting across different attempts, then repeat the exercise under new conditions to build practical experience.
Create a Personal Photography Project
A photography project gives your practice a clear direction and helps you explore a subject in greater depth. You could document local architecture, photograph changing light, study urban textures, or create a collection of images based on a particular color.
Set realistic goals and maintain a consistent approach throughout the project. Review your strongest images periodically, identify recurring visual preferences, and use those observations to develop a more recognizable photographic style.
Build a Photography Portfolio
A portfolio presents your strongest work and demonstrates your creative approach to viewers, clients, or potential collaborators. Select images that show technical skill, thoughtful composition, and a consistent standard of visual quality rather than including every photograph you have taken.
Organize photographs into relevant collections, such as portraits, landscapes, street photography, or abstract work. Review the selection regularly, remove weaker images, and ensure that each photograph contributes something distinctive to the overall presentation.
Frequently Asked Questions
Which Artistic Photography Techniques Are Best for Beginners?
The best starting techniques include the rule of thirds, natural lighting, leading lines, reflections, and negative space. These approaches require little equipment and help beginners understand how composition and light shape a photograph.
How Can I Make Ordinary Photos Look Artistic?
Pay attention to light, perspective, background, and the placement of your subject. Try photographing familiar objects from unusual angles, using reflections, isolating details, or experimenting with shadows to discover fresh visual possibilities.
Do I Need a Professional Camera for Artistic Photography?
A professional camera is not essential for learning artistic photography techniques. Smartphones and entry-level cameras can produce excellent images when used with careful composition, appropriate exposure, and an understanding of available light.
Which Lighting Is Best for Artistic Photography?
There is no single lighting condition that works best for every subject or style. Soft window light can flatter portraits, golden-hour sunlight can create warmth, and hard directional light can produce dramatic shadows and strong graphic shapes.
How Can I Develop My Own Photography Style?
Developing a personal style requires experimentation, observation, and consistent practice. Explore different genres, study the work of photographers you admire, and identify the colors, compositions, subjects, and lighting approaches that appeal to you.
Conclusion
Artistic photography techniques help transform everyday scenes into meaningful visual experiences through composition, lighting, perspective, color, and creative experimentation. Each technique offers a different way to guide attention, communicate emotion, and develop a distinctive photographic style.
Start with simple exercises, practice consistently, and evaluate your results with curiosity. Whether you photograph landscapes, portraits, architecture, or abstract details, thoughtful creative choices can help you produce more engaging images with almost any camera.

1 Comment
Pingback: Creative Digital Artwork: A Complete Beginner’s Guide - Zonapk