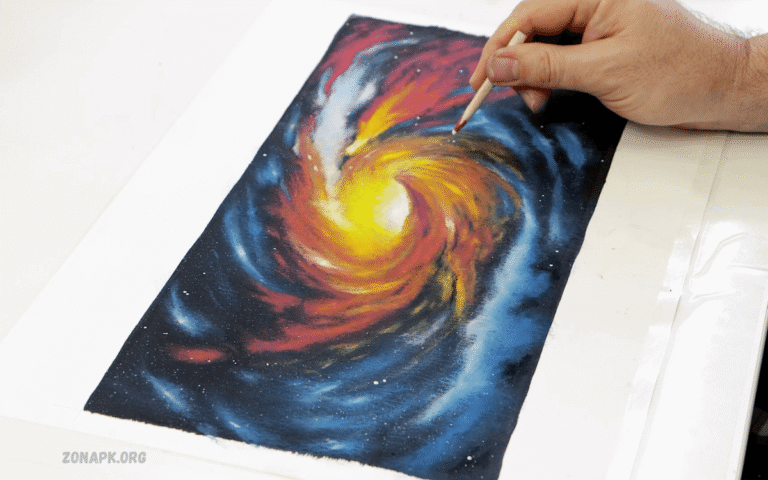
The oil pastel drawing is one of the easiest, no matter your age or skill level. With their soft texture and bright, bold colors, oil pastels are perfect for beginners who want to explore art without needing expensive supplies or complicated techniques. Unlike other art mediums, oil pastels don’t require brushes, water, or extensive setup. All you need is a sheet of paper and a set of pastels to start creating.
What makes oil pastel drawing so beginner-friendly is its forgiving nature. You can blend colors easily with your fingers or a piece of cloth, layer shades to add depth, and even make quick changes without starting over from simple shapes and nature scenes to beautiful landscapes.
Whether you’re a student, hobbyist, or simply looking for a relaxing activity, oil pastels provide a fun and stress-free way to create art. It’s a great way to improve focus, relieve stress, and boost your mood. So grab your pastels and paper—it’s time to bring your imagination to life with easy oil pastel drawing!
What Are Oil Pastels?
Oil pastels are a fun and colorful art medium composed of a mixture of pigment, wax, and oil. They look like crayons but are much softer, creamier, and easier to blend. Due to their smooth texture, oil pastels glide effortlessly on paper, creating bold, vibrant colors that stand out beautifully.
Unlike regular crayons or colored pencils, oil pastels don’t need water or brushes. You can use your fingers, cotton swabs, or blending tools to mix and smudge the colors. This makes them perfect for beginners, kids, or anyone who wants to enjoy art without a complicated setup.
Oil pastels are excellent for creating a range of artwork, from simple doodles to detailed portraits and landscapes. Artists love them because they allow for rich textures, smooth blends, and layering effects. They work well on various surfaces, including paper, cardboard, and even canvas.
How to Start Drawing with Oil Pastels
Starting with oil pastels is easy, fun, and doesn’t require fancy tools. Here’s a simple step-by-step guide to help you begin your oil pastel art journey:
Gather Your Materials
You’ll need:
- A set of oil pastels (student or beginner-grade is perfect)
- Thick paper (like drawing paper or pastel paper)
- Tissue or cotton swabs (for blending)
- Pencil and eraser (optional for sketching)
- Fixative spray (optional, to protect finished art)
Choose a Simple Subject
Start with something simple, such as a sunset, a flower, or a fruit. Avoid complex scenes at first—it’s better to focus on learning how the pastels feel and blend.
Sketch Lightly (Optional)
If you want a guide, lightly sketch your drawing with a pencil. Keep the lines soft so they don’t show through the pastels.
Start Coloring and Layering
Begin with lighter colors and build up to darker shades. Don’t press too hard; instead, layer slowly. You can blend colors using your finger, tissue, or blending stump.
Add Details and Texture
Once your base is done, use the tip of the pastel or scratch with a toothpick to add fine lines, highlights, or textures.
Protect Your Artwork
Oil pastels remain soft, allowing your art to smudge. You can spray it lightly with a fixative or store it with a sheet of paper on top.
That’s it! The more you practice, the better you’ll get. Enjoy the process, and have fun creating colorful artwork!
Read Also: How to Make a Hand Cut Photo Fake
Must-Have Tools for Oil Pastel Drawing
Getting started with oil pastels doesn’t require a significant investment. A few essential tools are enough to help you create beautiful, vibrant artwork. Here’s a list of must-haves for every beginner:
Oil Pastels
Choose a beginner-friendly set with a good range of colors. Brands like Camlin, Pentel, Cray-Pas, or Mungyo offer affordable and quality pastels for learners.
Thick Drawing Paper
The regular paper might tear or get oily. Use cartridge paper, pastel paper, or textured sheets (160 gsm or higher) to hold the colors better and allow easy blending.
Blending Tools
- Fingers (most common and easy!)
- Cotton swabs or tissue paper (for soft blending)
- Blending stumps or tortillons (for precise blending)
Pencil and Eraser
Use a light pencil, such as HB, for sketching outlines. A soft eraser helps clean up mistakes or lighten areas before coloring.
Scraping Tools
A toothpick, safety pin, or paperclip can be used to scratch and add fine details or textures after layering pastels.
Fixative Spray (Optional)
This helps protect your artwork from smudging. Use a non-toxic fixative spray designed explicitly for pastels, or place a protective sheet over your work when storing it.
With just these simple tools, you’re all set to enjoy the fun and freedom of oil pastel drawing!
How to Blend Oil Pastels Like a Pro
Blending is one of the most exciting parts of using oil pastels. It helps you mix colors smoothly, create depth, and make your artwork look more polished and professional. Here are some easy yet effective techniques to blend oil pastels like a pro:
Use Your Fingers
The most common and easiest method! Rub your finger gently over two colors to mix them. The warmth of your finger helps soften the pastels for a smooth blend. Keep a tissue nearby to wipe off any excess color.
Try Cotton Swabs or Tissue Paper
For softer blends or smaller areas, use a cotton swab or rolled tissue. It gives more control and keeps your hands clean while still providing a smooth effect.
Blending Stumps or Tools
These pencil-shaped tools are perfect for blending fine details or edges. You can buy them at art stores or use a tightly rolled piece of paper.
Layering and Blending
Apply a Light base color, then add another color on top. Gently blend them. Repeat the process to build depth and shade.
Use a Bit of Oil (Advanced Tip)
Mineral oil and lightly rub over the pastels. This melts and blends colors smoothly like paint. Be careful not to overdo it.
Scratch for Texture
After blending, use a toothpick or pin to scratch fine lines or textures. This technique, called sgraffito, works well for hair, grass, or fur details.
With a bit of practice, you’ll find the blending style that suits you best. Don’t be afraid to experiment—blending is where the magic of oil pastels really shines!
Frequently Asked Questions
How do I keep my oil pastel drawing from smudging?
Use a fixative spray after finishing your drawing, or store it with a sheet of paper on top. Avoid rubbing the surface.
Are oil pastels safe for kids?
Yes, most student-grade oil pastels are non-toxic and safe for kids. Always check the label and supervise young children while using them.
What’s the best brand for beginners?
Affordable and reliable brands for beginners include Camlin, Mungyo, Pentel, and Cray-Pas. You can upgrade to artist-grade pastels later.
Can I mix oil pastels with other art supplies?
Yes! You can combine oil pastels with colored pencils, markers, or even acrylic paint for mixed media effects. Just experiment and see what works best.
How do I improve my oil pastel drawing skills?
Practice regularly, try new techniques, watch tutorials, and don’t be afraid to make mistakes. With time and effort, your skills will continue to grow.
Conclusion
Oil pastel drawing is a simple, fun, and rewarding way to express your creativity. Whether you’re a beginner or someone looking to try a new art style, oil pastels offer bold colors, smooth blending, and endless possibilities with minimal tools. You don’t need expensive materials or advanced techniques—just a bit of practice and a willingness to experiment.
From basic shapes to stunning landscapes, oil pastels allow you to create vibrant and eye-catching artwork at your own pace.

